
Use this 10-step client onboarding checklist to start every new client relationship smoothly, securely, and on time. Your five immediate actions: send the welcome packet, confirm the signed engagement letter, collect a completed W-9, set up invoicing and payment, and schedule the kickoff meeting. Templates for each step are in Section 4 below.
The fastest way to wire these steps together: connect a Typeform intake form to DocuSign via Zapier so a completed intake automatically triggers the signature envelope. That single automation eliminates the most common delay in onboarding new clients.
- Send welcome packet within 24 hours of signed agreement
- Confirm engagement letter is fully executed before any billable work starts
- Collect a completed, current W-9 before the first payment
- Set up invoicing in QuickBooks or your billing system
- Schedule the kickoff meeting and share the agenda in advance
Pro Tip: Build a reusable job template in your project management tool (Asana, ClickUp, or Monday.com) with all 10 steps pre-assigned to roles. Every new client gets the same flow without anyone rebuilding it from scratch.
Key Takeaways
A repeatable client onboarding checklist, built around signed agreements, W-9 collection, and automated intake flows, reduces billing disputes, protects compliance, and cuts the time between signed contract and first delivered value.
| Point | Details |
|---|---|
| Start with five immediate actions | Send welcome packet, confirm signed agreement, collect W-9, set up invoicing, and schedule kickoff within 24 hours. |
| Compliance is non-negotiable | Collect a completed W-9 before any payment; the 1099-NEC threshold is now $2,000 for payments after December 31, 2025. |
| CAN-SPAM applies to onboarding emails | Every commercial onboarding message needs accurate headers, a postal address, and a working opt-out honored within 10 business days. |
| Automate the intake-to-signature flow | Connect Typeform to DocuSign via Zapier so a completed intake triggers the engagement letter automatically, with no manual handoff. |
| Rooted Up | Builds and manages done-for-you onboarding automation and monthly marketing operations for solo professionals and service businesses. |
Table of Contents
- What does a client onboarding checklist actually include?
- U.S. compliance items you must handle at onboarding
- Templates and downloads you need for a complete onboarding package
- Which tools speed up and secure your onboarding process?
- How to adapt this checklist for your specific service business
- Onboarding mistakes that predict trouble before it starts
- Why repeatable onboarding is worth the setup time
- Rooted Up handles onboarding automation so you can focus on your work
- Sources
What does a client onboarding checklist actually include?
A solid client onboarding checklist covers every step from signed contract to the 30-day check-in, with a named owner and a timing guideline for each task. Zapier recommends structuring onboarding into clear phases: welcome documents, legal readiness, payment setup, communications, and system setup. Here is the full 10-step version you can paste directly into your project tool.
Send the welcome packet | Owner: Onboarding manager | Timing: Within 24 hours of signed agreement Include a welcome email, your service overview, key contacts, and what the client can expect in the first 30 days. One-line action: "Welcome to [Firm Name]. Here's everything you need for a smooth start — your contacts, timeline, and what we'll need from you this week."
Confirm the signed engagement letter and scope | Owner: Sales / account lead | Timing: Before any billable work begins No work starts without an executed engagement letter that defines scope, deliverables, and fees. Store it in the client portal immediately.
Collect the W-9 and tax information | Owner: Billing / admin | Timing: Before first payment Request the client's legal name exactly as it appears on official filings, entity type, and EIN or SSN. A mismatch triggers backup withholding.
Set up payment and invoicing | Owner: Billing | Timing: Day 1–2 Create the client record in QuickBooks, confirm payment method, set invoice schedule, and send the first invoice or retainer request.
Send the client intake questionnaire | Owner: Onboarding manager | Timing: Day 1, alongside welcome packet Collect contacts, access credentials, deliverable preferences, key dates, and any existing vendor relationships. Use a Typeform or Content Snare form so responses feed directly into your project tool.
Set up system access and credentials | Owner: IT / operations | Timing: Within 48 hours of intake form receipt Grant portal access, connect relevant software (ad accounts, bank feeds, CMS logins), and confirm the client can log in before the kickoff meeting.
Collect and securely transfer documents | Owner: Onboarding manager | Timing: Days 2–5 Request prior records, IDs, or authorization forms through a client portal or encrypted transfer only. Never accept sensitive documents via unencrypted email.
Hold the kickoff meeting | Owner: Account lead + onboarding manager | Timing: Within 5–7 business days of signed agreement Cover roles, communication channels, milestone dates, and the 30-day plan. Send a written summary within 24 hours.
Confirm the project timeline and milestones | Owner: Project manager | Timing: Within 24 hours of kickoff Publish a shared timeline in the project tool with named owners for each milestone. Zendesk recommends a written onboarding timeline and a "what happens next" checklist so clients always know their next step.
Run the 30-day check-in | Owner: Account lead | Timing: Day 30 Review progress against the original scope, collect feedback, and document any scope changes in writing. This is also the moment to confirm all compliance items (W-9 on file, engagement letter signed, portal access working) before the relationship moves into steady-state delivery.
U.S. compliance items you must handle at onboarding
Skipping legal and tax steps at the start creates problems that are expensive to fix later. Three areas need attention before you send a single invoice or marketing email.
W-9 and EIN handling
Collect the client's legal name, entity type, EIN or SSN, and a completed current W-9 before making any reportable payments. The legal name must match official filings exactly.
The 1099-NEC reporting threshold rose to a higher amount for payments made after December 31, 2025. That change affects which clients need a W-9 on file at onboarding. If you pay a contractor or vendor more than $2,000 in a calendar year, you need their completed W-9 before the first check clears.
Compliance callout: For accounting clients, also collect IRS Form 8821 (tax information authorization) or Form 2848 (power of attorney) when you will be communicating with the IRS on their behalf. Verify EIN against the W-9 before entering anything into your accounting system.
CAN-SPAM rules for onboarding emails
Your welcome email and onboarding sequence are commercial messages under federal law unless they meet a narrow transactional exemption. The FTC's CAN-SPAM guidance requires accurate headers and subject lines, a valid physical postal address, a clear opt-out mechanism, and honoring opt-out requests within 10 business days. Each separate violation carries substantial penalties.
Being a paying client does not remove opt-out rights. The FTC is explicit: membership or subscription status does not exempt commercial messages from CAN-SPAM requirements. Under 15 U.S.C. § 7702, "transactional or relationship" messages are defined narrowly. A welcome email that promotes your services alongside account details is commercial, not transactional.
CAN-SPAM checklist for onboarding emails:
- Use an accurate "From" name and email address
- Write a subject line that reflects the email's actual content
- Include your firm's valid physical postal address in every email
- Add a clear, working unsubscribe link or opt-out instruction
- Honor opt-out requests within 10 business days
- Separate marketing sequences from purely transactional messages (receipts, access credentials, signed document confirmations)
Pro Tip: Set up two email sequences in your CRM: one transactional (receipts, credentials, document confirmations) and one commercial (newsletters, upsell messages). Only the commercial sequence needs opt-out copy, but adding it to both is safer and takes 30 seconds to configure.
Secure document transfer
Never collect W-9s, EINs, government IDs, or prior tax returns via unencrypted email. Use a client portal (Content Snare, your practice management platform, or a DocuSign-linked storage folder) with access logging. Verify that the client successfully uploaded documents before entering any figures into QuickBooks or your accounting system.
Templates and downloads you need for a complete onboarding package
A good client onboarding plan runs on seven reusable templates. Build each one once, save it as a job template, and every new client gets the same experience without anyone rebuilding it.
Templates to build and save:
- Welcome email/packet: Introduce your team, set expectations for the first 30 days, and list what you need from the client this week.
- Client intake form (Typeform or Content Snare): Collect contacts, access credentials, deliverable preferences, key dates, and billing details. One form, one submission, no follow-up emails asking for the same information twice.
- Engagement letter / SOW template: Define scope, deliverables, fees, revision limits, and termination terms. Executed via DocuSign before work starts.
- W-9 request instructions: A one-page PDF explaining what the W-9 is, why you need it, and how to submit it securely. Reduces back-and-forth for clients who have never been asked before.
- Kickoff meeting agenda: Roles and introductions, project scope recap, communication channels, milestone dates, and open questions. Send it 24 hours before the meeting.
- 30-day review checklist: Progress against scope, billing status, open items, feedback collection, and any scope change documentation.
- Secure upload instructions: One-page guide showing clients how to use your portal to submit sensitive documents.
Automation example: Typeform to DocuSign via Zapier
This three-step flow eliminates the manual handoff between intake and signature:
- Trigger: Client submits the Typeform intake form.
- Action 1 (Zapier): Create a new project in your PM tool (Asana, ClickUp, or Monday.com) using the saved job template, pre-populated with the client's name and key dates.
- Action 2 (Zapier): Send a DocuSign envelope with the engagement letter pre-filled from the intake data.
Log every signature and upload timestamp in the client portal so you can prove when documents were delivered, opened, and signed. That audit trail matters if a billing dispute arise later.
Pro Tip: Store every template as a reusable job template in your PM tool. When a new client signs, duplicate the template, rename it, and every task, owner, and due-date formula populates automatically. You spend two minutes on setup instead of 20.
Which tools speed up and secure your onboarding process?
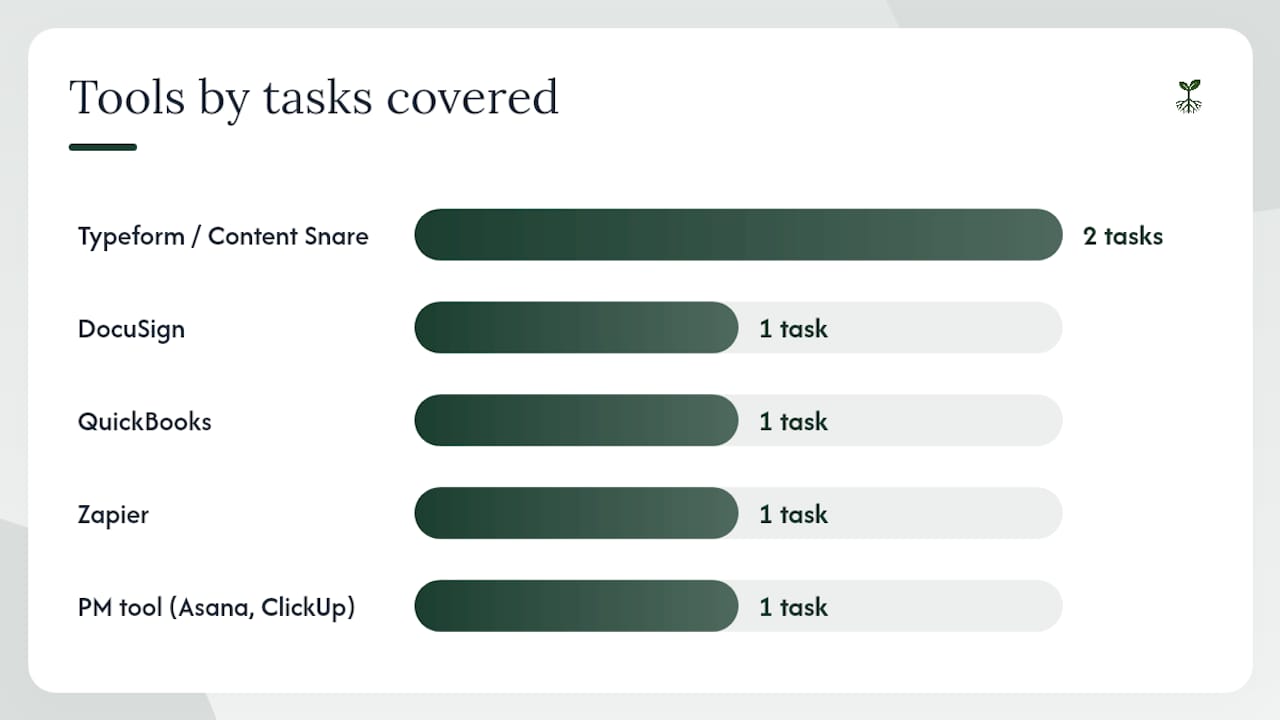
Five tools cover the full onboarding workflow. You do not need all five on day one, but the combination eliminates every common manual handoff.
- DocuSign: Electronic signatures on engagement letters, SOWs, and authorization forms. Provides a full audit log of when each party opened and signed. Start here.
- Typeform: Intake questionnaires that feel conversational rather than bureaucratic. Responses export cleanly to spreadsheets or feed directly into Zapier.
- Zapier: The orchestration layer. Connects Typeform, DocuSign, your PM tool, and QuickBooks so a single intake submission triggers the full onboarding sequence without manual steps.
- QuickBooks: Client record creation, invoicing, payment tracking, and 1099 preparation. Connect it via Zapier so the client record is created automatically from intake data.
- Content Snare: Structured document collection with automated reminders. Clients upload files to a secure portal; you get notified when each item arrives. Replaces the "did you get my email?" loop entirely.
For AI-assisted workflow automation that goes beyond these point-to-point integrations, the underlying logic is the same: one trigger, multiple downstream actions, no manual handoffs.
| Onboarding task | Recommended tool |
|---|---|
| Client intake questionnaire | Typeform or Content Snare |
| Electronic signatures | DocuSign |
| Billing and invoicing | QuickBooks |
| Document collection | Content Snare |
| Workflow automation | Zapier |
| CRM and project tracking | Your PM tool (Asana, ClickUp, Monday.com) |
Choose tools that support encrypted data transfer and maintain audit logs. For any tool handling W-9s or government IDs, confirm it meets SOC 2 Type II standards before you route sensitive data through it.
How to adapt this checklist for your specific service business
The 10-step checklist above works for any service business. These vertical tweaks make it fit your specific practice without rebuilding from scratch.
Bookkeeping and accounting firms: Add a conflict-of-interest check before the engagement letter. Request prior-year returns, bank statements, and current accounting software access in the intake form. Collect IRS Form 8821 or 2848 when you will represent the client. Verify EIN against the W-9 before touching any numbers.
Marketing agencies: Add brand asset collection (logos, brand guidelines, color codes) and access to ad accounts (Google Ads, Meta Business Manager) to the intake form. Swap in an agency-specific SOW that covers revision rounds and approval workflows. For marketing-service onboarding specifics, the Mailchimp alternatives guide covers checklist items relevant to email platform transitions.
MSPs and IT service providers: Add a network inventory form and remote access credential collection to the intake step. Include a signed acceptable-use policy alongside the engagement letter. System access setup (Step 6) expands to include RMM tool deployment and endpoint enrollment.
Consultants and coaches: Simplify the document collection step (no bank feeds or software access needed) but add a discovery call summary to the welcome packet so both parties agree on the problem being solved before the kickoff meeting.
SaaS onboarding teams: Replace the W-9 collection step with a subscription confirmation and billing profile setup. Add a product walkthrough session between kickoff and the 30-day review. Use a follow-up cadence to automate check-in reminders at days 7, 14, and 30.
Healthcare and wellness providers: Add HIPAA-compliant intake forms and a signed Notice of Privacy Practices to the document collection step. Use a HIPAA-compliant portal for all document transfers. Never route protected health information through standard Typeform or email.
Onboarding mistakes that predict trouble before it starts
Most onboarding failures are visible on day one if you know what to look for. These are the red flags worth pausing work over, and the one-line fix for each.
- No named owner for each task. Every checklist item needs a person's name, not a department. Fix: assign ownership in the job template before the client signs.
- Vague or unsigned scope. Starting work without an executed engagement letter is the single fastest path to a billing dispute. Fix: no billable hours until DocuSign shows "completed."
- Missing W-9 before first payment. You cannot file a 1099-NEC without it, and collecting it after the fact is awkward. Fix: make W-9 submission a prerequisite in your intake form.
- Access credentials collected over email. Passwords and login details sent via unencrypted email are a liability. Fix: use Content Snare or your portal for all credential collection.
- No kickoff meeting summary sent in writing. Verbal agreements evaporate. Fix: send a written summary within 24 hours of every kickoff call.
- Sales-to-delivery handoff not documented. The delivery team re-asks questions the sales team already answered, which frustrates clients immediately. Fix: include a sales handoff notes field in the job template.
- Marketing emails sent without opt-out copy. Even a welcome email that promotes your services is a commercial message under CAN-SPAM. Fix: add opt-out copy to every non-transactional message.
- No 30-day review scheduled at kickoff. Without a scheduled check-in, scope creep and billing disputes accumulate silently. Fix: put the 30-day review on the calendar at the kickoff meeting.
- Intake form responses not connected to the project tool. Manual data re-entry creates errors and delays. Fix: wire Typeform or Content Snare to your PM tool via Zapier on day one.
Pro Tip: Run a five-minute "onboarding audit" on your last three clients. Check whether each of the nine items above was completed, by whom, and when. The gaps you find are exactly where your next client will hit friction.
Why repeatable onboarding is worth the setup time
Most service providers treat onboarding as a one-time scramble rather than a repeatable system. That framing costs real money.
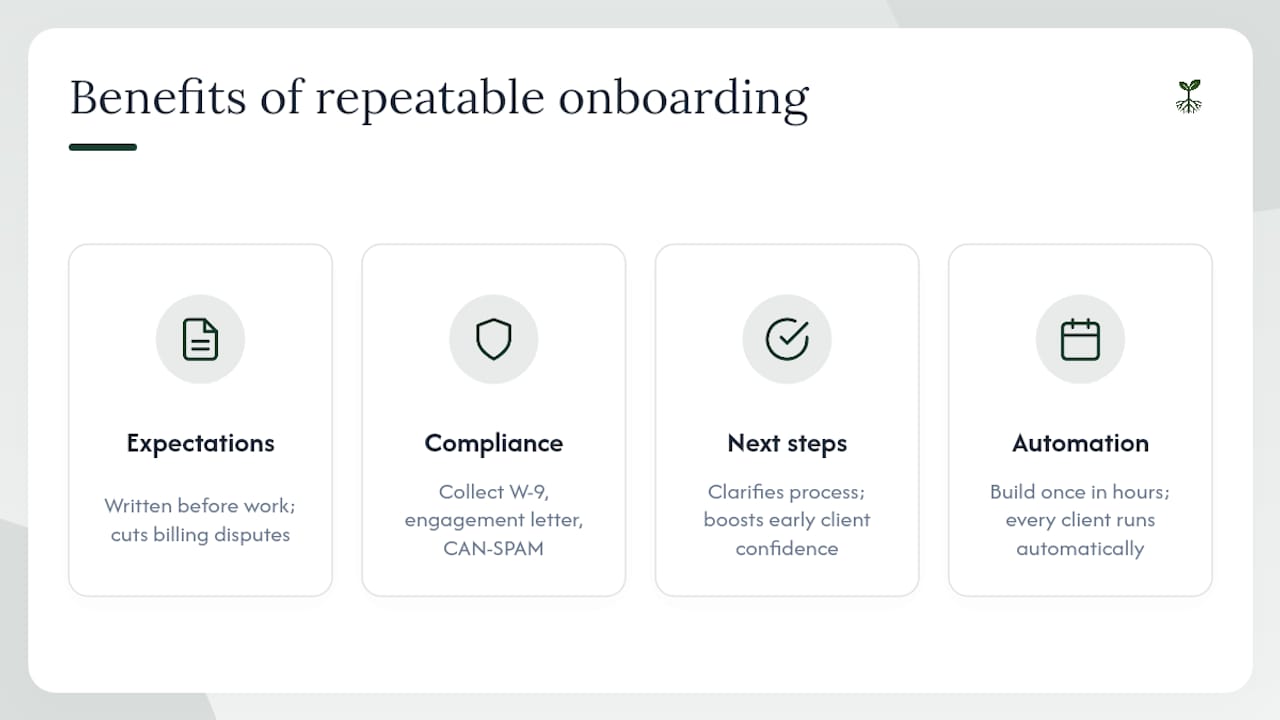
A structured onboarding process, built around a consistent client onboarding checklist and reusable templates, does three things that ad-hoc onboarding cannot. It sets expectations in writing before any work starts, which cuts billing disputes significantly. It captures compliance items (W-9, signed engagement letter, CAN-SPAM-compliant email sequences) before they become problems. And it gives clients a clear sense of what happens next, which is the single biggest driver of early client confidence.
The 30-day check-in is the most underused tool in this list. Zendesk's onboarding research points to ongoing review loops as a key driver of onboarding improvement. In practice, that check-in is also the moment you catch scope drift, billing misalignments, and access problems before they compound. Schedule it at kickoff, not as an afterthought.
The automation setup (Typeform to Zapier to DocuSign) takes a few hours to build once. After that, every new client runs the same flow without anyone managing it manually. That is the actual payoff: not just a better first impression, but hours recovered per client, per month.
Rooted Up handles onboarding automation so you can focus on your work
Solo professionals and small service businesses spend hours on onboarding admin that should run automatically. Rooted Up builds and manages the marketing and AI operational systems that make that happen, including intake automation, client communication sequences, and recurring workflow templates, all on a straightforward monthly plan.

You get a done-for-you setup: intake forms wired to your signature flow, onboarding email sequences built to CAN-SPAM standards, and job templates that replicate your process for every new client without manual rebuilding. The outcome is faster time-to-first-value for your clients and fewer hours lost to admin for you. If you want to see how this fits your practice, explore Rooted Up's services and packages and book a quick call.
Sources
- CAN-SPAM Act: A Compliance Guide for Business | Federal Trade Commission
- The 6-step client onboarding checklist (with template) - Zapier
- Customer onboarding guide: 11 templates + best practices | Zendesk
- Govinfo
This article is general information, not a substitute for advice from a qualified financial advisor. Consult a qualified financial professional about your own circumstances before acting on anything here.